
Effective soldering tips for LEDs can transform your projects, ensuring they are both efficient and cost-effective. Soldering LEDs is a vital skill in electronics, allowing for durable connections in a variety of applications. This article aims to provide a comprehensive guide to soldering LEDs, covering everything from essential tools to advanced techniques. By the end, you’ll be equipped with the knowledge to tackle your next LED project with confidence and precision.
1. What Are the Basics of Soldering LEDs?
Understanding the basics of soldering LEDs is crucial for anyone looking to acquire this skill. Soldering is the process of joining two or more electronic components together using a melting solder material. But here’s the kicker: the process may seem simple, but mastering it requires practice and understanding of the components involved.
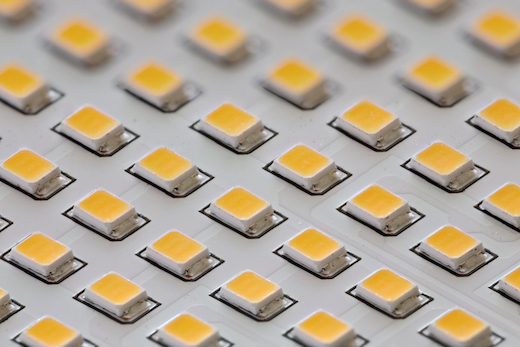
LEDs, or light-emitting diodes, can vary in type, from standard through-hole LEDs to surface-mount devices (SMD). Each type has its characteristics that influence how you solder them. Standard LEDs are typically easier to solder due to their larger leads, while SMDs require precision and sometimes specialized equipment. The importance of proper soldering techniques cannot be overstated; poor connections can lead to intermittent function or complete failure of the LED.
In addition to knowing the types of LEDs, it’s essential to understand the role soldering plays in the wider circuit. Solder provides a conductive path for electricity while also mechanically securing components together. This dual function makes soldering a fundamental skill for both hobbyists and professionals in electronics.
In summary, soldering LEDs involves a well-defined process that necessitates the right tools and techniques. Learning the basics enables you to progress to more complex soldering tasks while avoiding common pitfalls.
| LED Type | Characteristics |
|---|---|
| Through-Hole | Larger leads, easier to handle and solder |
| Surface-Mount | Smaller, requires precision and specialized tools |
| High-Power | May need additional thermal management during soldering |
2. Why Is Soldering Important for LEDs?
The importance of soldering for LEDs extends beyond simply connecting components. What’s the real story? A well-made solder joint can enhance the longevity and performance of LED assemblies significantly. Poor solder connections are a common issue in electronics and can lead to problems such as flickering lights, overheating, or complete circuit failure.
Understanding the role that soldering plays in electronics is essential for any practitioner. Good soldering practices ensure that the electrical and mechanical connections hold up over time. For example, a solid solder connection can reduce electrical resistance, allowing for optimal voltage and current levels to flow through the LED, thereby maximizing its luminosity and lifespan. Furthermore, proper soldering is vital for thermal management; excessive heat generated during operation needs to escape efficiently to avoid damaging the LED.
Another key factor is the cost implications. By investing time in learning proper soldering techniques, you can save both time and money in the long run. Projects that require rework due to poor soldering can become significantly more expensive when you factor in additional materials and labor costs.
In summary, mastering the art of soldering LEDs not only enhances the performance of your creations but also can lead to significant financial savings by reducing the risk of rework and failures.
| Importance | Benefits |
|---|---|
| Connection Quality | Enhances durability and electrical performance |
| Thermal Management | Ensures proper heat dissipation to protect components |
| Cost Efficiency | Reduces risks associated with poor connections and rework |
3. What Tools Do You Need for Soldering LEDs?
Having the right tools is a foundational element of successful soldering. But here’s the kicker: investing in quality tools can dramatically improve your soldering experience. At the very least, you’ll need a proper soldering iron. A soldering iron with adjustable temperature settings is ideal, as different components may require different heat levels. For most LED soldering tasks, a 25W to 30W soldering iron is adequate.
Additionally, soldering stations can enhance your workflow, providing temperature control and a workspace for your soldering tasks. These stations commonly come with a stand, a sponge for cleaning the soldering tip, and the option to employ various soldering tips for different projects.
Next on the list is solder itself. Choosing the right solder is crucial. For LED soldering, a rosin-core solder with a diameter of 0.030 inches is often effective. Lead-free solders are becoming popular in many applications, and while they are more environmentally friendly, they can require higher temperatures and different techniques.
Tweezers, wire cutters, and a small sponge for cleaning the soldering tip are also essential tools. Tweezers assist with handling and positioning small components, while wire cutters are crucial for trimming excess component leads after soldering.
Finally, a few safety items will keep you protected. Safety glasses and a good ventilation system or fume extractor will help reduce exposure to solder fumes. Inadequate ventilation can be harmful over repeated exposure times, making safety an essential consideration.
| Tool | Purpose |
|---|---|
| Soldering Iron | Heats solder for joining components |
| Soldering Station | Provides temperature control and workspace |
| Tweezers | Helps handle small components with precision |
4. How Do You Prepare for Soldering LEDs?
Preparation is key to successful soldering. What’s the real story? Setting up your work area correctly will streamline the soldering process and minimize mistakes. Before you begin, gather all your tools and materials. This includes your soldering iron, solder, LED components, and a clean work surface. A cluttered environment can lead to errors and mismanagement, so eliminate any distractions or unnecessary items.
Safety precautions are also paramount. Ensure that you are wearing protective eyewear to shield your eyes from potential solder splashes, and consider wearing gloves to protect your hands. It’s also essential to work in a space with good ventilation, as solder fumes can be harmful over time. If your workspace lacks sufficient airflow, consider investing in a fume extractor.
Understanding the components you will be soldering is critical. Read datasheets for the LED types you plan to use. Most datasheets provide valuable information regarding forward voltage, current ratings, and maximum temperature limits. Knowing this information will help you set your soldering iron to an appropriate temperature and avoid damaging the components.
Moreover, practice good time management. Allocate a reasonable amount of time for your soldering tasks and try to schedule breaks when necessary. This helps keep your focus sharp and allows you to maintain high-quality work.
In summary, thorough preparation can prevent mistakes and improve the quality of your soldering projects. Taking the time to organize your workspace, follow safety protocols, and understand the components you will work with sets you up for success.
| Preparation Step | Importance |
|---|---|
| Organizing Tools | Streamlines the soldering process |
| Safety Precautions | Protects against injuries and exposure |
| Understanding Components | Ensures proper handling and soldering settings |
5. What Are the Steps for Soldering LEDs Correctly?
Soldering LEDs correctly involves a systematic approach. Ready for the good part? Following a series of clearly defined steps can lead to effective solder connections that stand the test of time. First, start by heating your soldering iron. It’s essential to let it reach the right temperature before beginning to solder—most LED soldering tasks require temperatures around 350°C (662°F).
Next, prepare the LED leads. If you’re working with through-hole LEDs, it’s important to trim the leads if they are too long. This prevents excess wire from causing shorts or complications during soldering. For surface-mount devices, ensure that you have the correct pads prepared on your PCB.
Now it’s time to apply the solder. Position the LED component on the board, ensuring proper alignment. Contact the soldering iron tip to both the lead and the PCB pad for a second or two, allowing the pad and lead to heat up. Then, feed solder into the joint while removing the iron. It’s crucial to avoid moving the LED until the solder has cooled and set.
Once all connections are soldered, inspect each joint closely. A good solder joint appears bright and shiny, while a poor joint may look dull or have excess solder. If a joint is not formed correctly, heat it again and re-shape as needed.
Finally, do not forget to clean up. Remove any residual soldering debris, and trim any excess leads or wire from the newly soldered joint. By following these steps diligently, your soldering quality will improve noticeably.
| Step | Description |
|---|---|
| Heating the Iron | Ensure the soldering iron reaches the correct temperature |
| Preparing Leads | Trim excess leads and align with PCB pads |
| Applying Solder | Heat joint properly before feeding solder |
6. How Can You Avoid Common Soldering Mistakes?
Avoiding common soldering mistakes is key to improving your soldering skills swiftly. But here’s the kicker: many of these mistakes are simple to avoid with just a bit of awareness. One of the most frequent errors is failing to heat both the LED lead and the PCB pad adequately before adding solder. This can result in cold solder joints that can lead to electrical faults later.
To prevent this, always ensure both surfaces are heated evenly before applying solder. Also, pay attention to the solder itself; using the wrong type of solder—like lead-free solders that require higher temperatures—might not produce a strong connection if your soldering iron isn’t set appropriately.
Another common pitfall is using too much solder. While it might seem like more solder could strengthen a connection, excess solder can create shorts or cause components to stick together. Aim for a dome-shaped solder joint that meets, but doesn’t overflow the lead and pad connection.
Lastly, always double-check your work before moving on. It’s easy to miss a poorly soldered joint when you’re in a hurry. Take a moment to inspect each joint to make sure they are clean, shiny, and properly formed. If you find a mistake, take the time to reheat and fix the joint before proceeding. Consistency in these practices will yield much better results over time.
| Common Mistake | Prevention Strategy |
|---|---|
| Cold Solder Joint | Heat both surfaces before applying solder |
| Excess Solder | Apply solder in moderation to avoid shorts |
| Overlooking Joints | Inspect each connection thoroughly after soldering |
7. What Techniques Help with Soldering Small Components?
Soldering small components can be particularly daunting, especially for beginners. What’s the real story? Specialized techniques and tools can simplify this process, improving both quality and ease. When working with small LEDs or SMD components, a steady hand is crucial. Consider using a magnification device, such as a magnifying glass or a jeweler’s loupe, to get a better view during assembly.
Additionally, using a pair of fine-tipped tweezers can help you handle small components with precision. Proper placement is essential; if an LED is slightly off, it can lead to issues down the line. For SMDs, you might also consider using adhesive or solder paste to hold components in place temporarily while soldering.
A hot air rework station is another effective tool for soldering smaller components. This device blows hot air over solder connections, melting the solder to create joints without direct contact. This method is not only efficient for SMD components but also minimizes the risk of thermal damage to surrounding parts.
Finally, practice makes perfect. Consider assembling practice boards with similar components to enhance your skills. The more comfortable you become with the tools and processes, the easier it will get with actual projects.
| Technique | Description |
|---|---|
| Magnification Devices | Improves visibility when soldering small parts |
| Fine-Tipped Tweezers | Enhances precision in handling components |
| Hot Air Rework Station | Melts solder without direct contact to minimize risk |
8. How Do You Test Soldered LEDs After Assembly?
Testing soldered LEDs effectively ensures the reliability of your connections and components. Ready for the good part? This stage is vital to identify any flaws before final assembly or usage. To begin, visually inspect each solder joint closely. A strong joint will appear bright and smooth, while dull appearances may indicate cold connections.
Next, use a multimeter to check the continuity of your connections. Set the multimeter to the continuity testing mode. By touching one probe to the LED lead and the other to the corresponding PCB pad, you can confirm whether electricity will flow properly. A beep from the multimeter indicates a good connection, while silence indicates an issue.
Additionally, testing the LED functionality is essential. If you have a power source on hand, apply the appropriate voltage to the LED. Monitor its illumination to confirm it operates as expected. Make sure you respect the LED’s specifications to avoid damage during testing.
Finally, consider stress testing for critical applications. This may include running the LED at maximum capacity for a short time to ensure stability under load. Regularly testing soldered connections as part of your workflow will boost your confidence and improve the reliability of your projects.
| Testing Method | Purpose |
|---|---|
| Visual Inspection | Identifies defects in solder joints |
| Multimeter Test | Verifies electrical continuity |
| Functionality Test | Confirms proper LED operation |
9. What Maintenance Do LEDs Require After Soldering?
Caring for your soldered LEDs post-assembly is crucial for ensuring their longevity. But here’s the kicker: neglecting maintenance can quickly lead to component failure. Regularly inspecting your LEDs after soldering is vital. Look for signs of heat damage, which could manifest as discoloration or burnt components.
In addition, check for any mechanical stress. If your assembly is present in an environment where it’s subject to frequent movement or vibration, the solder joints could weaken over time, leading to intermittent connections or failures. Reinforced mounting methods can help protect against such issues.
Cleaning is another critical aspect of maintenance. Residual flux can attract dust and moisture, potentially leading to corrosion or conductivity issues. Use isopropyl alcohol and a soft brush to clean your LED assembly, ensuring all debris is removed.
Finally, monitor the performance of your LEDs regularly. Should you notice changes in brightness or flickering, it may warrant further investigation. Identifying problems early will enable you to perform repairs or replacements before they lead to more significant issues.
| Maintenance Task | Importance |
|---|---|
| Regular Inspections | Detects signs of damage or stress |
| Cleaning | Prevents corrosion and malfunction |
| Performance Monitoring | Ensures optimal operation |
10. How Can You Improve Your Soldering Skills Over Time?
Improving your soldering skills is a continuous journey. What’s the real story? With dedication and the right resources, you can enhance your abilities significantly. One of the most effective ways to develop your skills is through regular practice. Dedicate time each week to work on small projects that challenge you without overwhelming you.
Online tutorials and courses offer excellent guidance for beginners and advanced users alike. Websites like YouTube and sites dedicated to electronics provide ample video resources that cover soldering techniques in-depth.
Participating in electronics forums can also be beneficial. These platforms allow you to connect with others who share your interests, providing opportunities for feedback and knowledge exchange. Consider joining community workshops or clubs that focus on soldering or DIY electronics. This collaborative learning environment can accelerate your growth.
Finally, don’t shy away from more complex projects and challenges. The more you expose yourself to different techniques, the more proficient you’ll become. Learning from mistakes is part of the process—embrace them as opportunities to refine your skills.
| Improvement Strategy | Description |
|---|---|
| Regular Practice | Build skills and confidence over time |
| Online Tutorials | Provides visual guidance on techniques |
| Community Engagement | Gain insights and feedback from experienced peers |
11. What Are the Cost Benefits of Proper Soldering Techniques?
Understanding the cost benefits of proper soldering techniques can have a significant impact on your bottom line. But here’s the kicker: effective soldering can save you money in more ways than one. One major cost advantage is the reduction in rework expenses. Poor soldering techniques lead to unsatisfactory results, often requiring you to redo work, wasting both time and materials.
In contrast, mastering proper soldering techniques enhances quality control in your projects. As the reliability of your assemblies improves, you’ll notice a decline in the failure rates of your end-products. This, in turn, translates to lower warranty claims and enhanced customer satisfaction.
Assembling your own LED projects can result in significant savings when compared to purchasing pre-assembled units. The ability to solder components on your own enables you to make adjustments or repairs easily, effectively extending the lifespan of your products.
Ultimately, a small investment in quality tools and education can yield substantial financial benefits over time. The skills you develop will enhance your productivity, allowing you to focus on more complex projects and challenges.
| Cost Benefit | Explanation |
|---|---|
| Reduced Rework Costs | Fewer defects lead to less waste of time and materials |
| Improved Reliability | Reduced failure rates enhance customer satisfaction |
| Increased Lifespan | Ability to repair and modify extends product life |
12. What Are Some Advanced Soldering Techniques?
Once you’ve mastered the basics, there are numerous advanced soldering techniques you can explore. Ready for the good part? These techniques allow you to tackle more complex projects with confidence. One such method is “drag soldering,” particularly useful for soldering unconnected leads on SMD components. Rather than applying solder directly, you drag the soldering iron tip across leads while feeding solder; this is particularly efficient for dense layouts.
Another advanced technique is “reflow soldering,” commonly used in professional PCB manufacturing. This method involves applying solder paste to the pads of SMD components and then heating the entire board, melting the paste and creating connections. A hot air rework station or oven is typically used in this technique, offering a highly efficient way to solder multiple connections simultaneously.
Additionally, consider exploring soldering under a microscope. This advanced process is imperative for working on multi-layer PCBs or intricate designs where precision is paramount. The additional magnification allows you to see fine details, making it easier to manage tiny components and ensuring quality connections.
Learning and applying these advanced techniques can make you a more versatile and capable soldering technician, thus enhancing your overall competency and marketability in the industry.
| Advanced Technique | Application |
|---|---|
| Drag Soldering | Efficient method for dense SMD layouts |
| Reflow Soldering | Ideal for manufacturing and batch soldering |
| Microscopic Soldering | Enhances precision with small components |
13. How Does Soldering Impact Overall Project Success?
Soldering quality plays a pivotal role in the overall success of any electronic project. What’s the real story? Proper soldering not only affects the functionality of individual components but also determines the reliability and longevity of the final product. Poor soldering can lead to failures in operation, resulting in costly repairs and downtime.
Consider issues like intermittent connections or failures due to cold solder joints, where parts might appear secure but ultimately do not conduct electricity reliably. Such problems can derail a project’s success by increasing maintenance costs and negatively impacting user experience.
On the flip side, projects that are well-soldered tend to demonstrate higher durability and reliability. This quality reflects positively on the brand, enhancing customer trust. When consumers encounter a consistent level of quality, they’re more likely to return for future purchases or recommend the brand to others.
Moreover, meticulous soldering contributes to smoother production processes. Fewer defective units mean less time spent reworking or troubleshooting, allowing for efficient workflow and faster project completion. Ultimately, soldering’s impact on project success emphasizes the need for cultivating high-quality soldering skills among technicians.
| Impact Area | Explanation |
|---|---|
| Functional Reliability | Ensures components operate as intended |
| Brand Reputation | High quality enhances customer trust |
| Production Efficiency | Less rework and faster completion times |
14. What Trends and Innovations Exist in Soldering Technology?
Soldering technology continually evolves, offering exciting new tools and materials. Ready for the good part? Innovations are reshaping how we approach soldering, providing enhanced efficiency and effectiveness. One notable trend is the shift toward lead-free solders, which are not only more environmentally friendly but also comply with regulations aimed at reducing toxic waste. Lead-free solder formulations have advanced significantly, offering improved performance characteristics without compromising reliability.
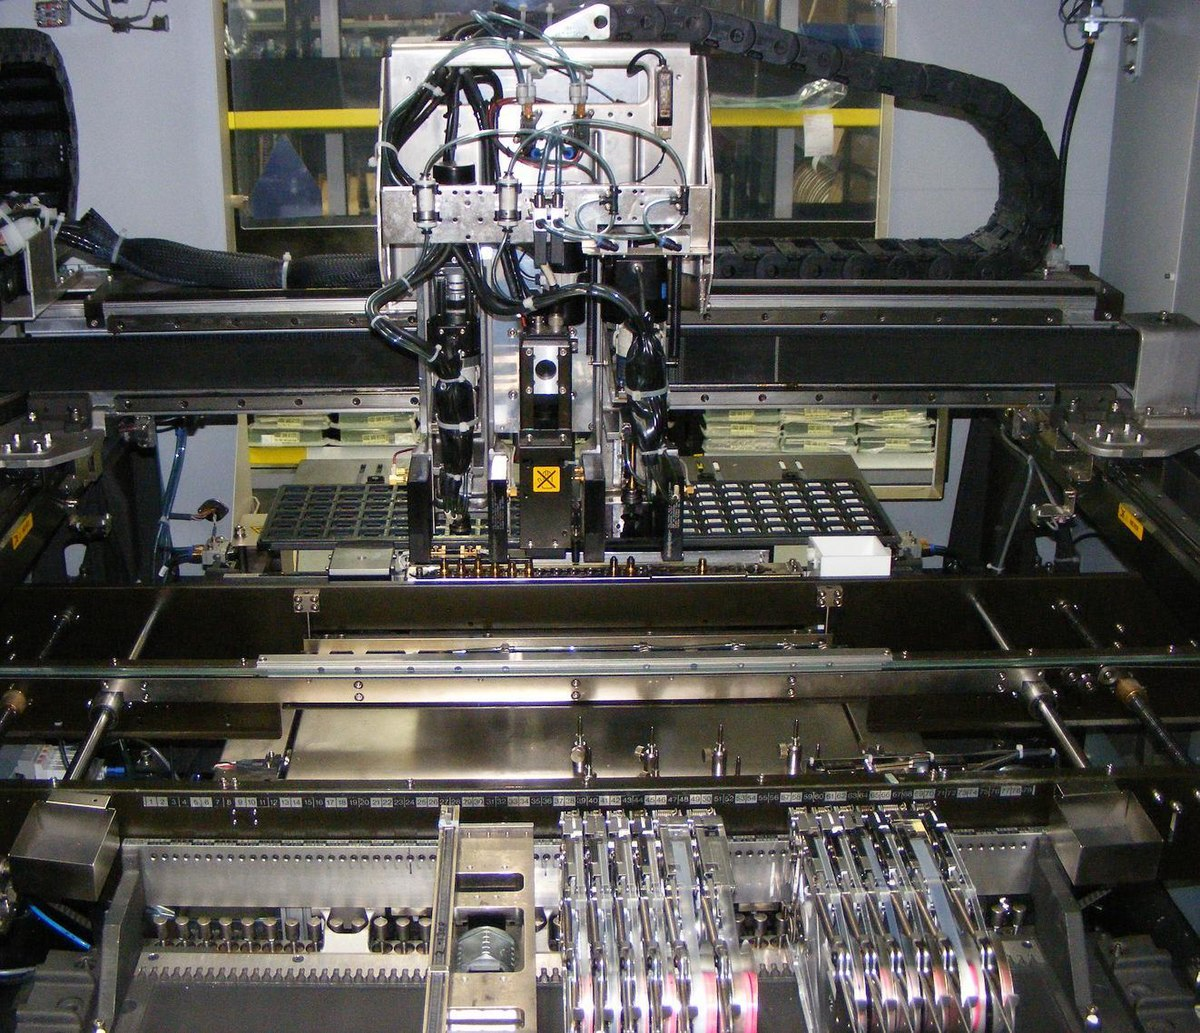
Another innovation is the emergence of soldering robots, which streamline production processes, particularly in high-volume manufacturing environments. These robots offer incredible precision and speed, reducing human error and increasing throughput. They can handle complex soldering tasks, paving the way for more intricate designs.
Finally, smart soldering tools are gaining traction. These devices come equipped with sensors and connectivity features that provide real-time feedback during soldering. They can display temperature profiles, detect cold joints, and even suggest optimal soldering techniques based on the components being used. Such technology supports technicians in achieving better results and fosters skill development over time.
Staying informed about soldering technology trends is vital for professionals aiming to remain competitive in the field. Embracing these advancements can enhance overall efficiency, improve quality, and lead to greater success in electronic projects.
| Innovation | Description |
|---|---|
| Lead-Free Solders | Eco-friendly options that comply with regulations |
| Soldering Robots | Automated systems for high-precision soldering |
| Smart Soldering Tools | Enhanced feedback and guidance for technicians |
15. How Can You Stay Updated on Soldering Best Practices?
Maintaining knowledge of soldering best practices is crucial for ongoing success. What’s the real story? Engaging with the soldering and electronics community keeps you informed and provides avenues for continual improvement. Subscribing to industry publications and online forums is an excellent way to learn about new techniques, tools, and trends in soldering.
Online resources and platforms offer numerous tutorials and articles that cover soldering best practices. Websites like YouTube showcase videos from experts providing hands-on demonstrations, while online courses allow for in-depth learning at your own pace.
Networking with other professionals at workshops and seminars can provide invaluable insight. Attending soldering competitions or expos allows you to connect with others in the field, share experiences, and learn from expert practitioners.
It’s also beneficial to practice self-reflection through project analyses. After completing soldering projects, take the time to evaluate what went well and what could be improved. Documenting these experiences equips you with personal best practices based on real-life challenges.
Ultimately, staying updated on soldering best practices enhances your skills and equips you to deliver high-quality results consistently.
| Learning Resource | Purpose |
|---|---|
| Industry Publications | Provides updates on soldering trends |
| Online Courses | Offers structured learning opportunities |
| Networking Events | Facilitates connections with fellow professionals |
Conclusion
In conclusion, effective soldering techniques for LEDs can save time and money while enhancing project quality. From understanding the basics of soldering to exploring advanced techniques and innovations, mastering this skill is crucial for anyone in the field of electronics. Proper preparation, attention to detail, and a commitment to continuous improvement will yield excellent results and lead to success in your electronic projects.
FAQ Section
Q1: What is soldering?
Soldering is the process of joining two electronic components by melting solder, a filler metal, to create a conductive connection.
Q2: How does the soldering process work?
The soldering process involves heating the soldering iron, applying it to the joint of components, and feeding solder into the connection to form a reliable electrical bond.
Q3: What tools do I need for soldering LEDs?
Essential tools for soldering LEDs include a soldering iron, solder, tweezers, wire cutters, and a soldering station for temperature control.
Q4: How can I avoid common soldering mistakes?
To avoid common soldering mistakes, ensure both the LED and PCB pad are heated adequately before applying solder, and inspect every joint for quality before proceeding.
Q5: How can I improve my soldering skills over time?
Improving soldering skills can be achieved through regular practice, watching online tutorials, participating in community workshops, and constantly challenging yourself with more complex projects.